Golf carts – both electric and gas – can provide tons of fun and enjoyment during the spring, summer, and fall season.
But when winter comes along, you’ll probably have to store your cart for the season.
And, unless you live in Florida, Texas, or other areas that are very warm for most of the year, this storage season could be several months.
As a result, you need to know how to store both electric and gas carts for this lengthy period without causing any damage to your cart or engine.
How to Store Your Electric Golf Cart for the Winter

Between gasoline and electric carts, the latter type is probably a bit easier to store.
That doesn’t mean that things will be straightforward, per se, but that you won’t struggle as much as you might with a gas cart.
Thankfully, neither process is complicated.
However, knowing how to do them correctly ensures that you don’t make any mistake that could compromise your engine integrity.
Step One: Preparing the Battery

When it comes to storing your electric cart, you’re going to have to focus heavily on the battery.
This preparation is necessary because the battery is an essential part of your cart’s operation.
Typically, you’re going to want to start by placing your cart somewhere that is safe from winter weather, such as in a garage or in a shed with a door that shuts and locks securely.
Now, put your cart in neutral and place bricks in front of the tires to keep it from rolling.
Find either the tow or maintenance switch and flip it to that lowest setting to decrease battery drain throughout the winter.
Remove the battery, charge it up, and refill its water levels.
Check our guide on battery watering to get an idea of how to handle this simple but vital step for your golf cart battery needs.
Before you hook your battery back up, you should check the terminals and cords for any damage.
You may see corrosion on these areas that can be quite frustrating and which may affect the overall strength of your battery.
Replace wires or terminals that are too damaged.
Doing so can help to ensure that your cart is strong enough to withstand the winter and avoids fire dangers as well.
Protip: Do NOT engage the parking brake, if you have one on your cart.
You may be tempted to do so because it does make logical sense.
Parking your cart will make sure it doesn’t move, right?
Yes, but the parking brake is not designed to stay engaged for months at a time.
As a result, it will get severely damaged if you leave it engaged.
Therefore, you should just put blocks in front of the tires, as suggested earlier, to ensure that you don’t run into any complications with your wheels.
Step Two: Perform Simple Tire Checks
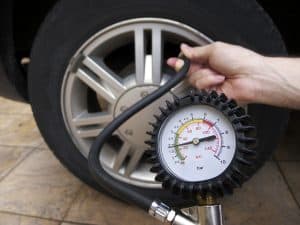
At this point, your cart’s battery should be in good shape, and your cart is getting closer to storage readiness.
However, you need to make sure that you check your tire pressure and re-inflate them as necessary.
The winter cold will naturally cause shrinkage in your tire’s air pressure that driving can help to manage.
However, you won’t be driving your cart and need the pressure to be at a suitable level.
Once you store your cart and shut the door of the shed, your tires should lose much less air pressure than they would normally.
However, there is also a small chance that they still lose some air.
Though it might not seem like a big deal, a loss of air pressure puts unnecessary pressure on the frame of your cart and could cause it to become damaged if it sits for too long in one place.
Protip: Make sure that you check up on your tires periodically throughout the winter to keep them fully inflated.
You don’t need to fill them up that often – once a month should be more than enough of a check.
There’s a good chance you’ll probably have to fill them up at least once during the winter, though your tires may not have this need if they are a little stronger than usual.
You should keep them at about 20-25 PSI for maximum protection.
Step Three: To Charge or Not to Charge…
Throughout the winter, you have an essential choice to make: whether to hook your cart up to a charger or to leave it off of a charger.
Many reasons exist for both approaches.
First of all, a trickle charger helps to keep your battery secure throughout the winter and maintains it at maximum health without overcharging.
Your cart’s OBC should be able to help with this simple step, but only if you keep the power flowing – otherwise, it may turn off after even days.
However, you may also want to avoid regularly charging your battery because you either don’t have a charger or are worried about potential damage to the battery.
The choice all depends on your needs and that of a cart.
Keeping the battery on a charger makes sure that it is ready for the spring but also doesn’t allow the battery to discharge fully, which can increase its strength.
Typically, we suggest doing whatever your cart’s manual says to avoid any complications here.
Protip: If you want to charge your battery, you may want to take it out of your cart and place it in a separate charger.
This step helps for several reasons.
First of all, it minimizes the time that your cart needs to be on while it charges.
Secondly, it lets you take your battery inside of your home to keep better track of its health.
Again, the choice depends on your needs, so don’t hesitate to do what seems natural and easy for you and your cart.
Step Four: Basis Cleaning
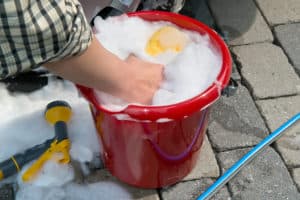
Now that your cart is more or less ready to store, you should also do some necessary spot cleaning to keep it in strong shape.
This step includes eliminating dirt or other contaminants from the surface of the cart.
Try to scrub away all of these items to minimize potential damage.
Pay particular attention to spots such as underneath the cart to find mud and other debris that may exist there.
And don’t hesitate to open up the engine compartment and do a little careful spot cleaning.
Avoid using any water to prevent an electrical shortage.
Instead, use a small rag to break apart dirt and other stains that may spread through the area.
Take your time here, and work throughout the rest of your cart in a way that makes sense and which covers your needs coherently and effectively.
Protip: Even if you’re placing your cart in a shed or a garage, a cover may be a good idea.
These covers will help to keep mice and other pests away from your cart.
Just as importantly, they keep dust, dirt, and mold away as well.
Try to make sure that the cover goes over all of your carts and that you tie it down entirely to avoid this problem.
Use heavy cement blocks to weigh down the edges.
That step helps to stop mice, insects, and other vermin from getting under the cover and causing cart damage.
Tips In Storing Your Electric Golf Cart For The Winter
How to Store Your Gas Golf Cart for the Winter
Many of the steps covered in the previous section on electric carts are the same here.
However, the gasoline engine complicates things a little and makes this situation more involved.
As a result, we’re going to only briefly talk about the steps mentioned above to make sure that those who skipped that section at least know how to perform them.
Then, we’ll go into detail on the gasoline-specific steps that help to keep your engine protected from damage during the winter.
Step One: Basic Preparation Steps

The preparation of your gasoline cart starts out using the same necessary steps of your electric cart, and includes the following critical processes:
- Park your cart in a safe area, engage the tow/maintenance switch, and place blocks in front of the tires to prevent movement – do not engage the parking brake!
- Charge your battery and clean its connections, replacing any damaged cords
- Inflate the tires to about 20-25 PSI, checking them occasionally throughout the winter
- Clean the body and the interior of the cart thoroughly to give it the level of protection that it needs
All of these steps shouldn’t take more than a few hours of an afternoon to finish – some might even take much less.
However, they need to be done correctly to ensure that your cart is protected.
If uncertain, please read the previous section on electric carts to get more detailed instructions.
Step Two: Prepare Your Gasoline
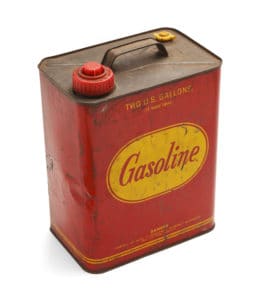
People can take a few steps when preparing their gasoline for storage.
Some suggest filling the tank and using a fuel stabilizer to keep the engine protected.
YamaLube is a great option here.
Then, you can turn off your fuel shutoff valve to keep the cart running smoothly.
However, others suggest completely draining the gasoline to avoid any complications during the winter.
Whichever step you choose, make sure that you work with ethanol-free petrol as much as possible to ensure that you don’t run into any interior rusting in your cart engine.
Step Three: Drain Your Carburetor
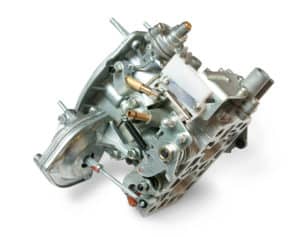
If your golf cart has a carburetor – and it should – you need to drain it before you move on to the next steps.
Start by finding the drain bolt on the carburetor – it should be labeled – and loosening it slightly.
Place a pan underneath the cart and then run it for five minutes to drain the carburetor.
Now, turn the clutch by hand after you turn off the cart and remove the key to put your valves in the closed position.
This step helps to ensure that your gasoline engine is in great shape by preventing stray fuel that may have stayed in the engine from spreading any further to other areas.
Step Four: Protect the Throttle Body
Lastly, you need to make sure that you spray an engine fogging oil across the throttle body and the carburetor while your cart is running.
This oil is designed to coat the interior elements of the cart to protect it from rust and other types of corrosion during a long and sometimes damaging winter.
At this point, you can turn off the cart, close the engine, and add a cover to protect it from other types of problems.
Doing so helps to keep it a bit warmer, as well, so you may even want to add a small heater in the storage shed to avoid other issues with your cart’s operation.


Leave a Reply