How to Adjust the Brakes on a Golf Cart
There is a common notion that golf carts do not need much maintenance due to their mechanic simplicity and low speeds.
However, that is not true.
Like any other vehicle, golf carts need maintenance and a little bit of adjustment and tweaks every now and then.
Although golf carts do not cause serious accidents, if not handled properly, they can result in accidents.
Therefore, always be sure to take proper care and maintenance of your golf carts.
Many modern golf carts have self-adjustment brakes and do not require manual adjustment, but they do need a little bit of tweaking here and there.
However, if you feel the brakes need adjustment, you can do so manually as well.
People who do not own modern carts or do not have self-adjustment brakes and have older carts can also easily do so manually.
Older golf carts have an adjustment screw on the backside of the brake drum, which can be turned to adjust the brakes.
We shall explain this process in detail.
Tools Needed
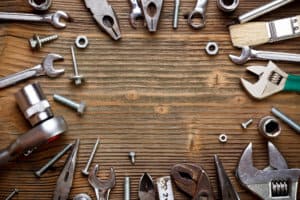
 For adjusting the brakes on a golf cart, you do not require a whole bunch of tools.
The job can be easily done with the help of a few essentials.
Following are the tools you will need, which you should prepare beforehand:
- 2-ton floor jack
- 4 blocks or bricks
- An adjustable wrench
- Socket wrench (¾ inch)
Steps for Adjusting Golf Cart Brakes
For New Golf Cart Models
Once you have the above set of tools, follow the steps below:
- Turn the power off on your golf cart completely, and its parking brake should not be set. Make sure the power is off before going onto the next step.
- You will need to put the two bricks in front of the cart and two right behind it in order to prevent it from rolling. Putting the blocks will keep the cart stable, making the adjustment process easier.
- Once you have the cart locked in one position, use the floor jack to lift it off the ground. You will need to lift the cart from the rear, so place the floor jack there. The rear wheels should simultaneously lift off.
- In this step, the wheels will be removed. For that, you will need to use the socket wrench, which will be responsible for loosening the lug nuts of the rear wheels and allow you to safely remove the wheels. Take the nuts and wheels off and put them aside.
- To find the brake adjustment screw, you will need to take the rubber boots off the wheels. Yank the rubber boots by your hands, and make sure you pull them hard.
- Now, you will need to make the brake pads move closer toward the brake drum by turning the adjustment screw in a way that it moves toward the wheels. Then, you will need to spin or turn the wheel by hand. If you feel resistance, adjust the brake again until you do not feel any sort of friction. You will have successfully adjusted the brakes once you do not feel resistance while turning the wheels.
- Now, you need to place the rubber boots back on the wheels, put the wheels as well as lug nuts back on and tighten them to stabilize them in their position.
- To put the cart back on the ground, remove the floor jack. After that, remove the bricks from the front and behind, and you are done!
Just follow the steps above, and you will have your cart’s brakes adjusted in no time.
Adjusting The Brake On Older Golf Cart Models
If you own an older golf cart, you might need to put in additional work to adjust the brakes.
Follow the steps below:
- Like before, prepare the necessary tools including the floor jack, bricks and wrench.
- Disconnect the battery pack of the cart.
- If your cart has a run/low switch, before disconnecting the battery, you need to put it in tow position.
- After that, put the bricks in front of the cart and behind it as well and place the floor jack in a secure position that would provide ample support.
- Now, on both the wheels, you will find wheel assemblies. Remove them.
- The parking brake of the pedal should be released.
- To avoid any tension along the shoe lever’s arm, you will need to back off the adjusting rod of the brake cable and remove the brake drum.
- You will need to check whether the shoes are torn out. Also, look for any sort of debris or if the drums are poorly fitted. You will need to clear the debris and make sure the shoes, brake drums, and plates are clean before you adjust the brakes.
- Self-adjusting brakes will turn and can slide back on and off without any friction at all. However, for manual-adjusting brake shoes, you should put the drum back on the axle. After that, turn the adjustment screw for locking the drum; keep turning it until it is locked.
- Now, place the ties back. You will need to torque the lug to 50 ft-lb.
- Then, adjust the brake pedal’s height and push the pedal. While pushing, you will notice a free play of about ¾ to 1 inch or 2 to 3 clicks.
- When you are done, connect the battery pack again and put the tow switch to run position.
- Lower the cart onto the ground by removing the floor jack. Do a test drive to ensure the brakes have been properly adjusted.
You should not have any problem while adjusting the brakes if you properly follow the above steps.
If you still face issues, try reviewing each step to make sure you have not left anything out.
Adjusting the Brakes on Different Model Golf Carts
E-Z-GO Golf Carts
E-Z-GO carts have a mechanical rear drum braking system that depends on the wear of the brake shoe, which adjusts the brakes in these carts automatically.
The brakes are adjusted while the cart is moving.
However, if the brake shoe is worn out, it turns the star wheel that will push the brake shoe closer to the brake drum, which will create a stopping force.
Follow the steps below to adjust the brakes:
- Get in the driver’s seat of the cart.
- Start the golf cart and accelerate it to its full speed, but make sure you have enough space on the road.
- Once it is running at full speed, press on the brakes to engage the braking system and before coming to a full stop, release the brake pedal. The automatic braking system of the cart will adjust the brakes while the cart is still moving.
Club Car Golf Carts
First of all, you will need to determine the model of your cart.
If it is pre-1994, its brakes will be assembled as a standard vehicle brake.
However, if it is post-1994, the brakes will have a brake shoe adjustor that is responsible for adjusting the brake shoe while the brake pedal is pressed.
If you are not aware of the model, just follow the steps below:
- Lift the rear wheels of the cart using the floor jack and with a ¾-inch socket wrench, remove the wheels
- Then you need to determine whether the shoe needs to be changed or not. If brakes are not squealing, you are good to go.
- After that, you need to adjust the brake pad and turn the adjusting screw that is on the back of the drum until the drum and pad are closer. Keep turning until good contact is made and then release the pressure until there is no resistance.
- To keep the brakes lubricated, use WD-40 to clean them, reattach the wheels and test the cart.
Yamaha
To adjust brakes on Yamaha golf carts, follow the steps below:
- Thoroughly clean the star wheel adjustor to ensure it spins freely.
- Remove the pins that attach the brake cable to the brake arm. Then, grab the back of the brake arm with a pair of vice grips and move it back and forth until it stops clicking with the drums and shoes.
- To reconnect the brake cable, loosen the 12 mm adjuster nuts on the brake pedal. Readjust the 12 mm nut until you get 1 to 1-and-a-half-inch of brake pedal travel.
Conclusion
If you own a cart and feel like its brakes are not as functional as they should be, simply follow the above steps to learn how to adjust the brakes manually for both old and new models.
It will not only save you a lot of money but also keep your cart running efficiently for years but only if all the steps are properly followed.


Leave a Reply