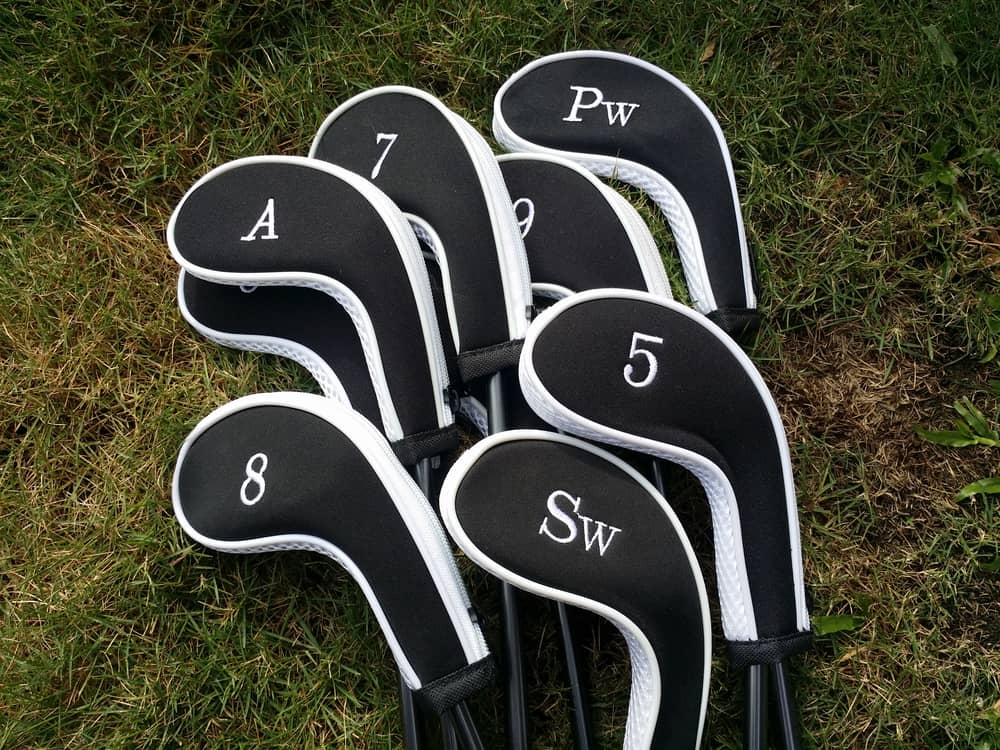
A golf head cover is something that you will put on your club to protect it from damage.
Most of the time, the golf head covers are going to come with your clubs when you purchase them.
However, if you lose the head cover or want to create something that is a bit more interesting and customized to your needs, you can make your own golf head covers.
The head covers that come custom to your clubs or with your initials on them are going to be quite expensive.
It certainly pays to be able to know how to make your own golf head covers.
In addition to using them for your own clubs, you can even make some for friends and family.
Here is a simple way to make your own golf clubhead covers.
How to Make Your Own Golf Head Covers (Step by Step)

The process for making your own head covers is going to vary a bit based on the materials that you use.
We will give you a thorough understanding of all that you need to know, and you will be able to adapt a bit based on the materials that you have on hand.
Step 1: Gather Materials
The most important part of this entire process is choosing the proper materials for your new head covers.
There is no questioning the fact that your golf head covers are going to get dirty.
These covers are going to get tossed in the back of the golf cart, fall on the ground, or spend some time in a dusty and dirty cart barn.
Gathering materials for making head covers means that you must also be aware of the material choice.
Find something that you think will be durable and that you will be able to wash if necessary.
If you can find something that is water repellent to work with, that is great.
However, most people are going to have a hard time finding materials like this.
It is helpful to keep your clubs dry whenever possible, and this is something that should be taken into consideration.
Some of the materials that we recommend include canvas or upholstery fabric.
Of course, there are some people who are satisfied with using cotton for their head covers or even knit them out of yarn.
In the end, you will have to decide what works for you and the way that you use your clubs and your head covers.
In addition to gathering materials for the top of the head cover, you are also going to need to have materials that cover the shaft of the club.
The perfect material for covering the shaft of the club is the tube sock.
With a tube sock, you can cleanly and easily attach the sock to the head cover, and it will do a great job of protecting the golf shaft.
These socks are usually very inexpensive, and you can even use some old (clean) ones that you have lying around.
Don’t worry about the condition that the socks are in because, as long as they are not falling apart, they should do the job just fine.
You can get these types of socks in a variety of different colors to help coordinate with the fabric that you have chosen for the top of the head cover.
Aside from that, you will want to have thread and a needle so that you can sew the head covers.
If you have a sewing machine, that will certainly work as well.
Scissors are also important to be able to cut the material that you are working with.
Step 2: Cut Material According to Pattern
The next step in the process is to cut the material in your pattern so that it is the proper size for your club.
There are plenty of free patterns online that will coincide with the type of clubhead cover you are trying to create.
Remember that some of the new drivers on the market are created with large and aerodynamic clubheads.
These clubheads are unique in shape and are going to have a hard time fitting in a standard head cover that may have been created a few years ago.
Try and get some measurements on the actual shape of the clubhead.
In all honesty, if your head cover is a little bigger than it needs to be, that is going to be better than it being too small.
The opening of the clubhead cover where the club has to push in is going to be the most important size to keep in mind.
Make sure that you don’t sew the neck of the head cover so tightly that the club will not actually fit through the opening.
This is important to remember throughout this entire process.
Step 3: Sew or Glue
Once you have all of your pattern pieces put together, you can start to sew or glue them.
When doing this part of the process, make sure that you are working on the inside, and then you can flip the fabric inside out, so the good-looking side is on the outside.
Make sure that you are not overlapping and sewing too much of the material, as it could end up making the clubhead cover smaller than you think.
There should be a slight edge around the pattern when you are cutting it out; this is the area where you will want to sew.
It’s a good idea to sew or glue a small bit and then flip the fabric inside out just to make sure that the stitching looks as it should from the outside.
Make sure that your lines are tight so that the clubhead cover will stay together for years to come.
If this is your first sewing project, you are likely going to make quite a few mistakes.
Luckily, as long as your pattern is cut properly, you won’t have to worry about these mistakes because you can simply take out your stitches and try sewing again.
When using a thicker material like canvas, always ensure that you are using a needle that is sharp enough and strong enough.
Step 4: Prepare Tube Sock
Next, you will cut the tube sock so that you are left with just the straight and narrow part of the sock.
You don’t need the heel part of the sock, and this should be cut off.
It makes sense to choose the longer socks so that you can have plenty of material covering the shaft of your club.
In fact, some people forget how important it is to take care of the shaft of the club.
It is just as important as the clubhead itself.
Step 5: Attach the Tube Sock
Once you have the head cover sewn or glued and the tube sock is ready to go, you can simply attach them using a bit of glue.
We recommend glue for this part because it is easier to get the sock in place than having to sew it on the clubhead cover.
You can take a bead of glue and run it around part of the inside of the head cover.
Then you can hold the tube sock in place until it adheres to the clubhead cover properly.
This part of the process takes a lot of time and patience, but once it is complete, your head covers will be ready to use.
You can get creative with the designs that you make and put together some unique looking socks that will work quite well for your clubs.
It is certainly better to have a homemade head cover than to leave your clubs without one.
Do Golf Clubs Come with Head Covers?

When you purchase a new golf club, it very often will come with a head cover.
However, this is not the case for all golf clubs.
If you are purchasing a used club or an iron or wedge, chances are the cover will not be included.
If you are getting a new driver or fairway wood, you will likely get a head cover along with it.
Sometimes if you are purchasing a golf club that was on the market last year and has since been removed, there may be no head cover.
This will typically save you a few dollars, but then you will have to find some other way to protect your new golf club.
When you purchase a putter, it usually comes with a head cover as well.
This is important because the putters on the market today are very unique in design, and you will have a hard time finding something that will match your clubs perfectly.
If your golf clubs come with a head cover, use them.
You must ensure that you have the proper protection for your clubs while you are on the course, especially when playing with a golf cart.
Why Do Golfers Use Head Covers?

Golfers use head covers to protect their clubs.
The clubs on the market today are very expensive, and they are made with material that can get damaged.
If you are using a head cover to protect your clubs, you won’t have to worry about quite as much damage to the club.
The two areas that a cover protects are the clubhead itself and the shaft.
If these two areas are properly covered, then you will not have to worry about the club starting to chip or potentially break.
If a titanium head golf driver gets a dent in it, the club is not going to be as useful long term.
The ability that this club has to fly a long distance and give you great results will be seriously impacted by a dent in the clubhead.
In addition, golfers like to use head covers to display a bit more about their personalities.
You will see some golfers with an animal on their head cover while others may have head covers from the college that they attended.
For players who use a golf cart to play their round, having a head cover means making sure that your clubs are not banging into each other the entire time that you are on your cart.
Cart golf tends to be the most damaging for golf clubs because they bang into each other as you are riding the course.
Can You Use Stuffed Animals to Make Head Covers?

Some people will use an old stuffed animal to make a head cover.
This project can take a bit more time than our ideas on how to make a head cover, however, it is a possibility.
Stuffed animals can make great head covers, and they offer plenty of protection for your golf clubs.
You will have to be careful what size head cover you go with because you will need to make sure that it is going to fit in your golf bag.
Having more than one stuffed animal head cover can get a bit cumbersome and make it hard to find your clubs.
Many golfers will get to the course, and the first thing they will do is put their head covers into their golf cart.
The problem with this is that the head covers in the golf cart will not be able to protect your clubs as you are driving around the course.
You will need to keep the head covers on the clubs for them to effectively do their job.
This is why the stuffed animal head covers can be a bit of an annoyance.
Are you really going to put the giant turtle on your driver after every single shot?
Chances are you probably won’t want to take the time to do that.
Choose a head cover that you will put on and take off for each shot, and it will help to make sure that your clubs last much longer.
Are Custom Head Covers Worth the Money?

Golf head covers are worth the money.
When you think about spending $500 on a new driver, it certainly makes sense to protect it with a head cover.
When you purchase fabric and make head covers yourself, you will save money and end up with a great custom product.
Don’t let your clubs remain unprotected in your bag.
If you want to make sure that your clubs last from one season to the next, protect them with the proper materials.
Conclusion
Hopefully, this guide on how to make your own golf head covers has inspired you to get all of your hybrids and woods in your bag protected.
If you want to make sure that your clubs are always there to perform for you and are not broken, chipped, or dented, head covers are essential.
Golf head covers will typically come with a new golf club, but many people lose them by forgetting them at a local golf course.
If you want to find the matching golf head cover again, you can look on a website like eBay to see if there are options available for you to purchase.
However you have to get it done, make sure that your golf clubs are appropriately protected the next time you go to play.
The price that you pay for the head covers will be much less than the damage that they will prevent.
The next time you hear a golf cart go by with all the clubs clanging together, it should make you cringe knowing the damage that it is creating.


Leave a Reply