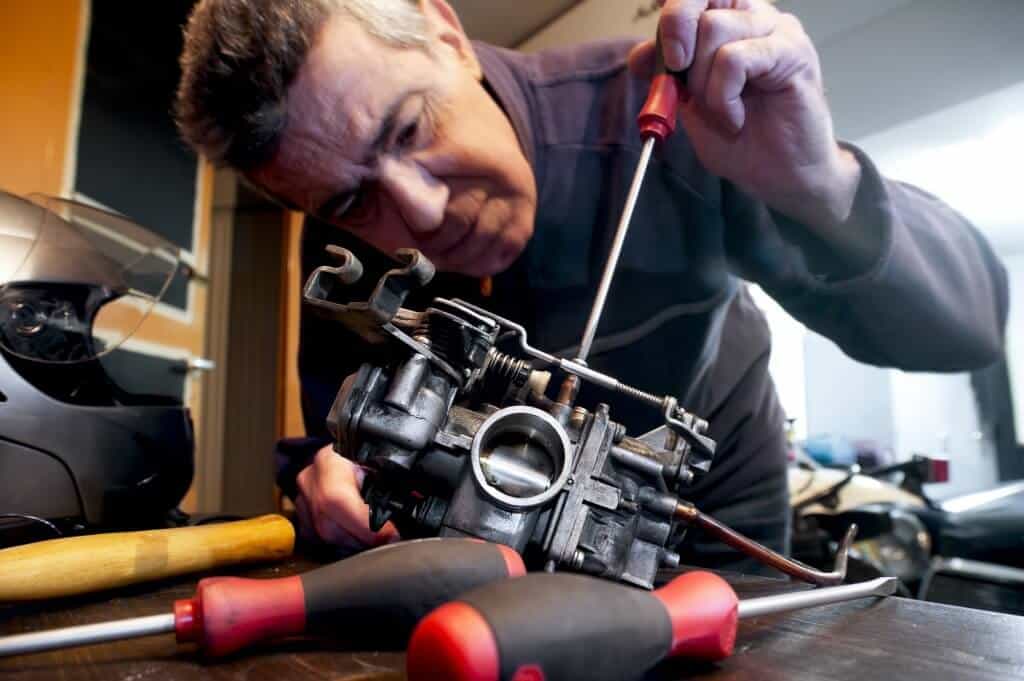
Gas-powered golf carts have never been quite as popular as electric models because they are not as efficient and run out of fuel.
However, they are also more powerful and typically last longer, which makes them popular with a certain subset of buyers.
However, these buyers may find that the carburetor on their cart is threatening to go out or is causing issues with cart operation.
As a result, it is important for cart owners to understand how to adjust and troubleshoot their golf cart carburetor when anything goes wrong.
In many cases, an owner may be able to do these steps on their own but may also require an expert.
And don’t forget – we’ve broken down the main three manufacturers Club Car, EZGO, and Yamaha into separate sections to make this article specific to your needs.
How to Adjust/Troubleshoot a Golf Cart Carburetor
Symptoms a Carburetor is Going Bad
A golf cart carburetor is just like any other carburetor on a gas-powered vehicle.
While it may be a bit smaller and have a slightly simpler design, the overall look and feel is the same.
More importantly, the purpose of a carburetor on a golf cart remains the same – decreasing fuel waste and minimizing your carbon output to ensure that your cart runs safer and smoother when you ride it.
However, when a carburetor starts to go out, your cart will still run.
That’s part of what makes it so tough to diagnose and troubleshoot problems with this part.
Rather than causing your cart to stop running, a bad carburetor will make it less efficient and cause a sluggish action.
As a result, it is important to pay attention to how your cart runs to ensure that it doesn’t cause any issues.
First of all, pay attention to how quickly it takes you to run out of gas when driving your cart.
Does it seem to run out a lot sooner than it did when you bought it?
That may just be down to wear and tear and aging.
However, this decrease in efficiency is also a big symptom that your carburetor is going bad and either needs to be replaced or repaired as soon as possible to keep your cart safe.
If your fuel efficiency doesn’t seem heavily decreased, pay attention to how well your cart accelerates when you’re driving.
Does it feel just a little bit more sluggish than it did when you first purchased it?
There’s a good chance that your carburetor may be having a problem.
That’s because your carburetor helps to keep the cart running smoothly and with even and powerful acceleration.
Other problems that may affect your golf cart include regular overheating or backfiring.
These issues occur because your carburetor does not properly mix your fuel and it is much too lean for your cart.
As a result, it may stutter and struggle to run properly without help.
You may also see this problem trigger a steady cloud of black smoke as you drive that is quite nauseous.
Whatever the problem that your cart experiences, it is crucial to understand how to diagnose them before they become too persistent.
Typically, your cart will showcase a myriad of issues that will make it quite clear that your carburetor is struggling.
However, there are many differences between the cart models and manufacturers that may make this process a little harder to properly execute.
As a result, you must read through the following article to learn more about how to troubleshoot and adjust carburetors for each manufacturer.
We may pinpoint one or two carts for each of these companies or highlight a more general approach.
This choice all depends on what type of information we could find and how well we could report it based on its availability.
EZGO Cart Carburetor Troubleshooting
EZGO manufactures many different carts, each gas model of which has a carburetor that may run into complications over time.
These issues are not uncommon with other cart manufacturers – however, some are more common in EZGO carts.
As a result, we’ve decided to showcase some of the most likely concerns you’re going to run into when trying to troubleshoot your carburetor.
And we’ll also make sure to showcase a few ways that you can adjust your carburetor to keep it running smoothly.
There are a handful of different adjustment methods that manufacturers have utilized over the years.
By understanding which of these choices are best for your cart, you can make sure that you don’t do anything improperly and cause damage to your cart.
Troubleshooting Specific Troubles
Your EZGO carburetor is likely to run into a handful of different problems that make it run less efficiently.
These concerns can stack up on each other quite quickly and trigger a myriad of other issues that can be hard to properly manage.
However, if you spot them quickly with these troubleshooting steps, you shouldn’t have any difficulties.
Just a few problems you may experience, along with the symptoms to watch for when troubleshooting include:
- Gas Leak – Look for a worn or damaged inlet valve, problems with the float pin or bowl, gaskets, and vent tubes throughout your engine
- Valve Seat – Your seat may be worn, damaged, dirty, or blocked, and cleaning it out may help to keep ti running smoothly again
- Sludgy Acceleration – May show problems with blocked gas passages and issues with your tubes or jets that may need to be cleaned and managed
- Air Filter Issues – As your air filter gets dirty, there’s a good chance that your golf cart isn’t going to run as smoothly as it once did in the past
- Dirty Components – When the components of your carburetor aren’t properly cleaned, your engine may run poorly and have weak acceleration
- Contaminated Hoses – Hoses that are filled with dirty, mold, and other items may make your cart run less efficiently and cause complications with its operation
- Jet Troubles – The jets on your cart help to keep the carburetor running properly, and if they malfunction, you may end up with an inefficient or inoperative carburetor
- Gas Flow Problems – If gasoline is not flowing to your engine properly, there’s a good chance that the carburetor won’t properly work and may malfunction or break down
Thankfully, many of these problems are quite easy to fix without a lot of challenge.
For example, replacing float pins is relatively easy if you know how to handle this step.
And you can usually quite easily manage cleaning a valve seat or clearing out many tubes.
However, you may not be ready to handle problems that are more extensive, such as complications with the jets.
Adjusting Your Carburetor
Once you figure out what is wrong with your carburetor, you have a few options.
You may need to get it cleaned, repaired, or replaced by a professional.
Or you may just need to adjust it using this simple process.
In most EZGO carts, you’re going to have little difficulty with this process.
Almost every EZGO model you’ll find on the market can be adjusted in this simple way:
- Open up your motor and find the carburetor on your engine – the location will vary
- Find the idle jet screw – it should be labeled as such – and turn it one-quarter of its distance
- Identify the cold valve on the cart and use a flat screwdriver to create a clearance of 0.004 mm
- Close up your hood and start your cart to see how well it runs
- Turn off the cart and repeat these steps if you have more issues
In just about every situation, these steps should get your carburetor back to prime working order and avoid any complicated repair processes.
However, there may be situations in which these steps don’t work.
If you find that you can’t adjust your carburetor and your cart is about to malfunction, contact a professional mechanic who can fix up your carburetor and other steps to keep your cart strong.
Yamaha Cart Carburetor Troubleshooting

The Yamaha cart carburetor type isn’t drastically different than that of an EZGO.
However, this brand is known for more affordable and streamlined carts, which means the carburetor may experience slightly different problems than EZGO or Club Car options.
As a result, we’ve compiled a list of the most likely issues you’re going to see in your Yamaha cart and what is likely causing them in your carburetor:
- Jerking Movements As You Drive – This problem could be a sign that you have a gas leak that is worsening on your cart and which needs repairs
- Loud Noises When Running the Cart – Block air filters, worn or damaged parts, dirty valve seats, and poor gasoline mixes may all cause this issue with your cart
- Sludgy Acceleration in Your Cart – If your cart accelerates but does so quite slowly, there’s a good change that your cart needs an adjusted choke
- Backfiring as You Accelerate – Your cart is not mixing its gas properly and your carburetor needs to be replaced to keep it running smoothly
- Surges in Speed As You Drive – Sudden surges in speed likely mean that you have a linkage issue with the governor that must be properly adjusted
- Poor Gas Economy – This issue is common with just about any carburetor issue but is particularly common if your gas is leaking from your cart
- Sudden Loss of Power – When this problem happens in your cart, there’s a good chance that your carburetor has failed completely and that you no longer get gas in it
Whatever the case, it is important for you to talk to an expert about these repairs to ensure that you get your cart running as smoothly as possible.
However, you may be able to fix some of these concerns by getting your cart’s carburetor adjusted.
Most of the time, you should have the skills necessary to handle this demand.
However, you may also want to find an expert who can do it for you.
That’s because there are many different processes that you may be able to utilize in this situation.
That’s because Yamaha has used a handful of different carburetor designs over the years.
Though this process is basically the same in most of them, we need to showcase a handful of different methods to ensure you get it right.
Adjusting Your Carburetor
Now that you now a few problems that may plague your Yamaha cart’s carburetor, it is important to figure out how to adjust it.
There are a few options from which you can choose for these carts.
They differ based on the model of your cart and the design of its engine.
Understanding these is critical for keeping a cart running as smoothly as possible.
This method is appropriate for a Yamaha G9 cart and other carts similar to it:
- Open up your cart hood to expose your carburetor and to make it easier to work upon
- Find the pilot adjustment screw on the edge of your carburetor
- Pay attention to this screw – it should be a sharp point and not flat
- Carefully remove this screw and then carefully screw it back
- Turn this screw out one and one-half turns to adjust it properly
- Find the throttle stop screw and then push it backwards on its threads
- Wait until the throttle shaft completely closes before you stop pushing
- Now carefully turn this screw back one-quarter turn
If you do not own a Yamaha G9 cart but, instead, have a cart such as a G1, that process won’t work for you.
Instead, you need to use a slightly different method to ensure that you get the best result.
The same basic steps may be repeated but you’ll notice a few differences when adjusting your carburetor.
These two options should give you the help that you need for a Yamaha cart:
- Carefully unscrew the air mixture screw, which has a smooth instead of a sharp point
- Turn it until it is slightly seated and then turn it out by one and one-half turn
- Push the throttle’s stop screw along its shaft to close it completely
- Turn the screw back one-quarter of a turn and keep it there
- Use an air blower to softly blow air into the inlet to raise the float
- Make sure that the float is level the carburetor’s base
If for any reason that this adjustment doesn’t work or you don’t feel comfortable doing it, reach out to a high-quality repair expert who can do it for you.
Remember – these simple changes will cause your carburetor to run differently than if you just left your engine alone.
So always make tweaks slowly to avoid serious issue.
Club Car Carburetor Troubleshooting
Club Car carts are designed to be among the most high-quality options on the market and provide a great level of stability and strength that is hard to top.
However, these carts can still experience issues with their carburetor that must be properly managed and assessed.
The following questions are things that you need to ask yourself to ensure that your carburetor is not malfunctioning:
- Is Your Cart Accelerating Poorly? – You may have a fuel flow issue that could be related to any number of issues, such as clogged fuel lines in the carburetor.
- Are You Losing Fuel Efficiency in Your Cart? – When your carburetor is failing, your cart is going to start losing efficiency and may break down as you ride.
- Does Your Cart Smell Bad As You Drive? – Bad smells from your cart’s exhaust could indicate a dirty air or fuel filter in your carburetor that causes it to burn fuel too hotly.
- When You Drive, Does Your Cart Occasionally or Repeatedly Stall? – Repeated stalls or even an occasional one may indicate carburetor issues that must be monitored and repaired.
- Do You Smell Gas or Run Out of Fuel Quickly? – Sometimes, carburetors develop gas leaks that may trigger problems with their operation and efficiency.
Typically, your Club Car cart is going to run into fewer issues than a Yamaha or EZGO cart.
This benefit is both a blessing and a curse.
It’s a blessing because you won’t have to worry about repeated carburetor replacement but a curse because carburetor failure is often severe as a result.
Adjusting Your Carburetor
Your Club Car’s carburetor should be fairly easy to adjust, depending on the type that you possess and what type of methods that you use.
The following method is designed for a 1995 Club Car carburetor, but may be useful for carts built before this time.
Make sure that you pay careful attention to your cart’s operation as you adjust to make sure you don’t run into any complications:
- Find the mixture screw and put it into a slightly sealed position from wherever it is located
- Carefully turn the screw outside by at least one and one-half turns
- Keep adjusting the screw slightly as needed until you reach the level you want
- Pay attention the air filter housing and intake house as you adjust to avoid leaks
- Replace the fuel filter when you are done to keep your air flow as smooth as possible
This method will work in 1995 Club Car carts all the way up to 1996 models.
At this point, you need to use a slightly different approach, which includes removing the torx screws from the aluminum cover near the cables and disconnecting the fuel line to get access to the carburetor before you take the steps above.
This is done in all DS carts from 1997.
After 1998, you need to follow the steps outlined here:
- Find the air and fuel mix screw that is as close to the engine as is possible
- Locate this screw by seeking one that also has a steeper angle than other engine screws
- Carefully turn the screw inward as your cart runs and listen to your engine’s operation
- Once the engine’s operation starts to sound drastically different, stop turning the screw
- Bring the screw back until the change in the engine disappears or evens out
- Ride your cart to test how well you have adjusted your carburetor
- Repeat these steps, as needed, to get your carburetor in great operational order
And while there are other ways you may need to tweak your Club Car carburetors after 1998, they are mostly going to be adjusted using this method or minor variations on this technique.
As for other cart models – such as Columbia models from the mid-1980s and other rare options – you should be able to use the information gathered here to come up with a solution that works well enough for your needs.
Make sure to check your cart engine diagram to avoid any issue here.





Leave a Reply